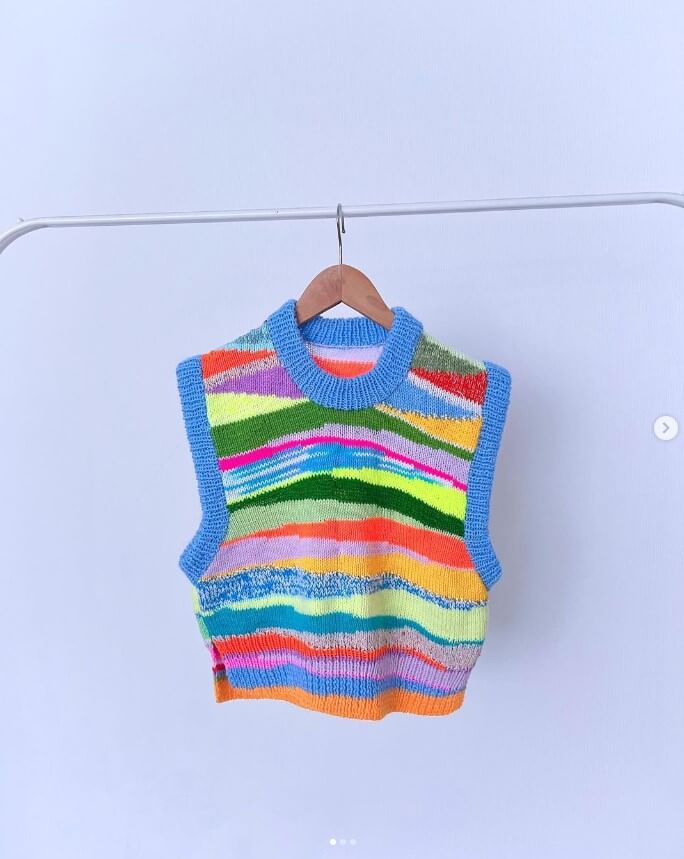
Every now and then when I’ve accumulated a lot of scrap yarn, I make a landscape sweater vest / jumper to try and use up as much of it as I can.
In this blog I’ll explain why I think these projects are such a great way of using up your scraps, how I design one, and some Instagram accounts that I’m continually inspired by doing similar things.
Why a landscape sweater vest?
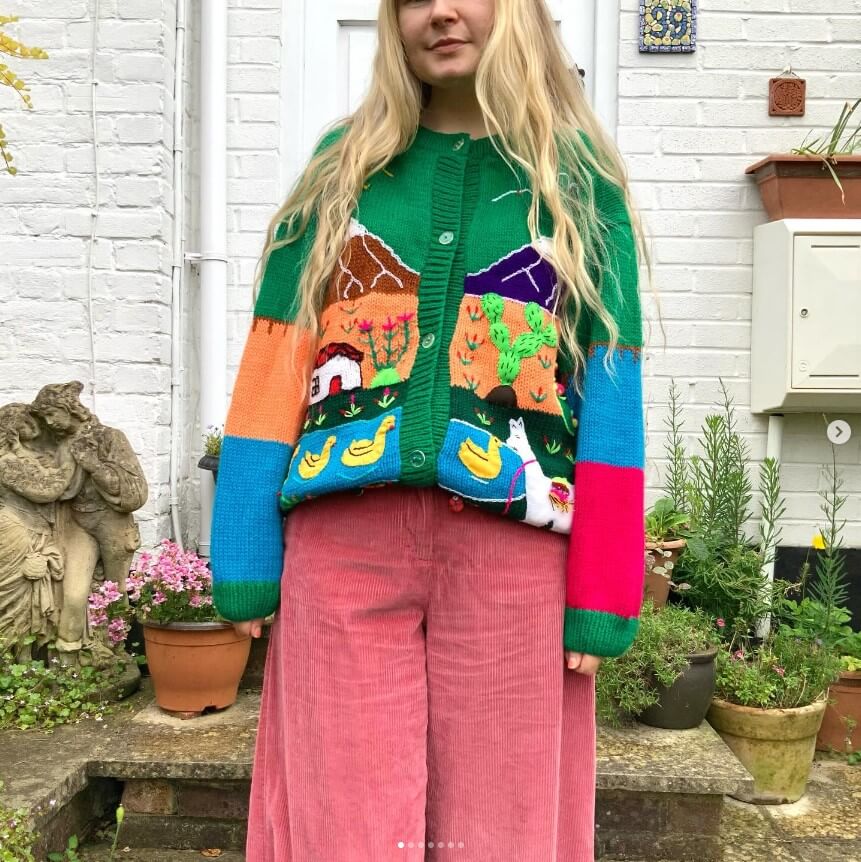
Firstly – I want to explain where my love for these started. Two of my best friends from childhood (twins) used to wear these cardigans that had houses, sheep, a sun in the sky etc. – similar to the photo below – and I remember just absolutely loving them. (If you’re from Brighton, perhaps you know the stall outside Snooper’s Paradise that sells these little landscape cardigans and jumpers for kids? I always do a very slow walk past that stall and am filled with knitspiration!).

Now that I’m an adult who knits, I love recreating these whimsical pieces, they fill me with a lovely warm nostalgia. I love wearing knitwear that looks like it was designed for kids!
Secondly, I’ll explain why I think landscape sweater vests are a great way to use up scraps:
Because there are so many little bits of colour going on in a landscape knit, they are ideal for using up those odd metres of yarn you have lying around. You can make the design as detailed or simple as you like, depending on how many scraps you have and in what colours etc. So you can really tailor the project to work around what it is you want to use up.
For instance, if I have a tiny amount of red lying around – I’ll use it to knit a little red door on a house, or use it to embroider apples in a tree at the end.
How I design a landscape sweater vest
When it comes to the scraps I’m trying to use up, I mainly stick to the same weight of yarn. For instance chunky, aran or worsted wool etc.
I do think that adding a bit of texture in from other fibres / weights of yarn can be great for adding effects. For instance using a white boucle yarn for a sheep or a cloud, or a variegated blue for a river or the sea. But other than different fibres I will do my best to use yarns of the same weight. Sometimes if I have much thinner scrap of yarn, I will double or triple it up to match the thickness of the rest.
Mentioned briefly in the last section, the first thing I do is look at the scraps I have – what the colour palette is like, how much I have of particular colours and so on. From there I decide what kind of landscape I’m going to knit. If there’s lots of ‘natural’ colours like greens, blues, browns and neutrals I tend to make a ‘natural’ landscape ie. hills, sea views, trees and so on.
If I have scraps that are more varied in terms of palette, I will do something more domestic, like a house on a hill or or other kind of buildings. I’d love to do a suburban landscape, with a little row of terraced houses, some cars, people – this is the plan for my next one!
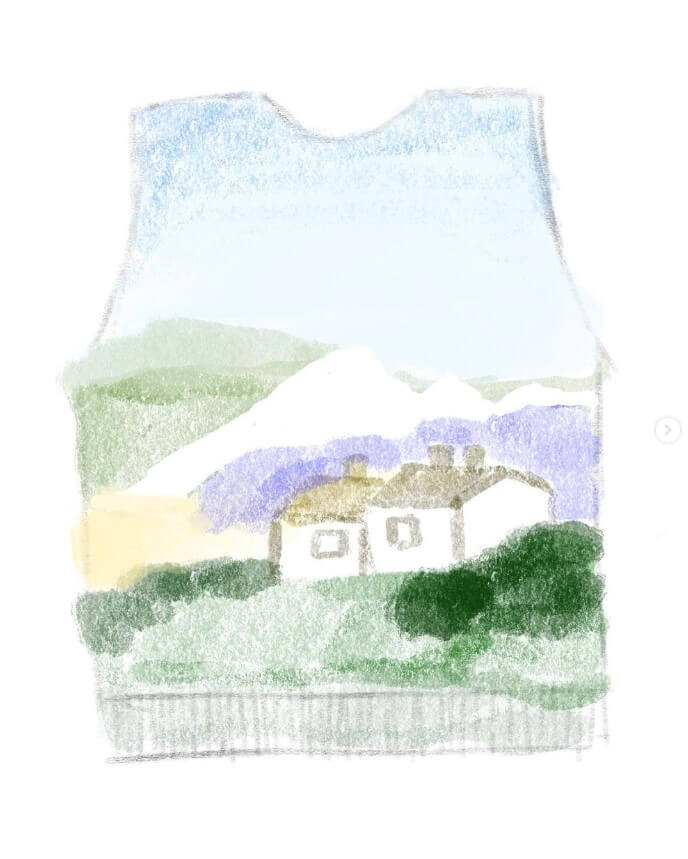
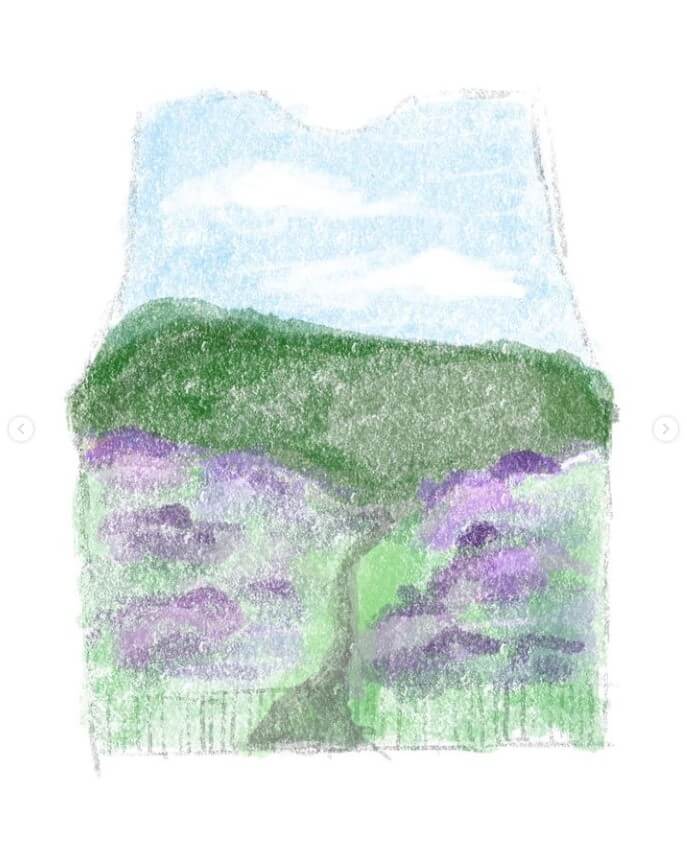
I then do a rough sketch on Procreate mapping out a first draft of the landscape scene, like the images below.
Once I’m happy with the sketch, I then use Stitchfiddle to draw myself up a chart. I work out how many stitches I need and how many rows the vest will have in total, then I black out the sections where there are decreases like the arm shaping and the neck hole so that the shape I’m left with is exactly the shape of the finished garment (like the chart below).
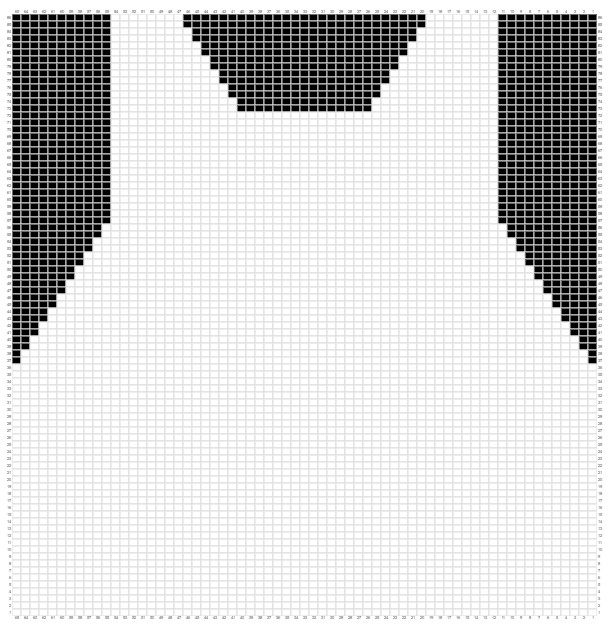
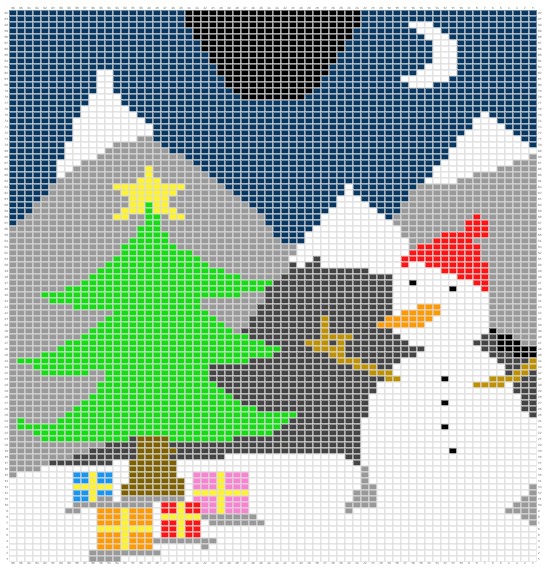
From there I just try and translate my sketch in to a grid. Firstly I block out the general areas of colours, and then go in a few times after that changing shapes, adding details and moving things around. The chart below is a first draft I made for a Christmas jumper I was going to make last year but never got round to. But this is an idea of how my charts look once I’ve drawn them up on Stitchfiddle.
When it comes to the actual shape and construction of the vest / jumper I’m knitting, I tend to stick to one of my own sweater vest patterns as the template. This is a pattern for chunky yarn, which is what I most commonly make a landscape sweater vest in. If I’m using a thinner yarn I tend to just make it up as I go – I’m someone that doesn’t love following patterns and instead prefer to ‘wing it’ (which can involve a fair amount of frogging!) so I’m also happy to just guesstimate how many stitches and rows I’m going to need. Luckily, they usually turn out pretty wearable first time.
(If I’m making a jumper rather than a vest, I don’t do any decreasing around the arm holes – I literally just knit a square with a hole for the head, like the Christmas chart above).
If you’re confident to do this also, I would recommend knitting a gauge swatch with the yarn you’re intending to use. From this you can approximate the amount of stitches you’re going to need and the amount of rows to reach the desired length. You can then make a Stitchfiddle chart with that information.
If this isn’t something you feel confident doing, I would find a pattern (that’s constructed flat rather than in the round and from the bottom up), and mapping it out on Stitchfiddle like I do. How to map it out (unfortunately this requires maths!): the pattern will tell you how many stitches to cast on, this is the first number you will put in to Stitchfiddle in the ‘columns’ section; easy. Next, you will have to go through the pattern and calculate how many rows you will be knitting.
Have something on you that you can keep a note on. If the pattern says, ‘knit 8 rows of ribbing’ write down 8, then ’32 rows of stockinette’ write down 32. Go through the pattern like this until the end, then add up all the rows, this will be the number you put in to ‘rows’ on Stitchfiddle. You will then have a rectangle shape. In to this rectangle, go up row by row whilst following the pattern, marking where the decreases are and the neck hole until you end up with something that resembles the plain chart above. You can now draw your design.
Once I’ve drawn up the chart and I’m ready to start knitting, I use the intarsia method for knitting the colourwork. Using intarsia does mean that I have to knit my vests flat rather than in the round. It also means that there’s a LOT of ends to weave in at the end, every knitter’s worst nightmare! I tend to knit the back of the vest and the ribbing in one solid colour, which does usually involve buying more wool (but on the whole these projects leave me with less yarn than I started with).
Any tiny amounts of colour that are no more than a few stitches wide and rows high, I tend to do as duplicate stitch at the end. This cuts down the amount of ends from using intarsia for them. I think it also makes the finished fabric a little neater doing it this way.
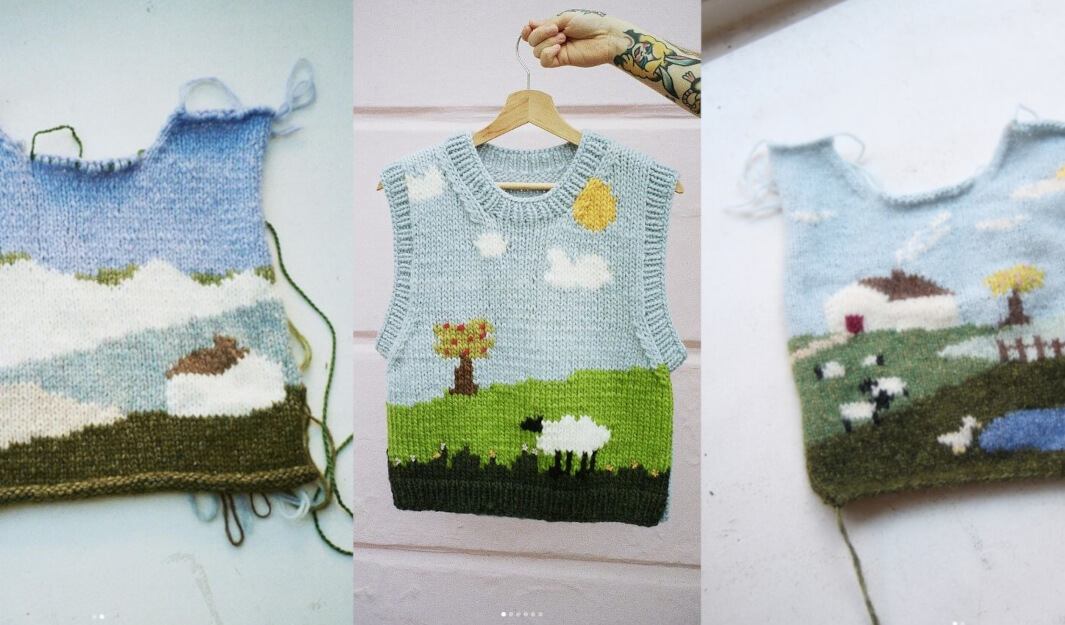
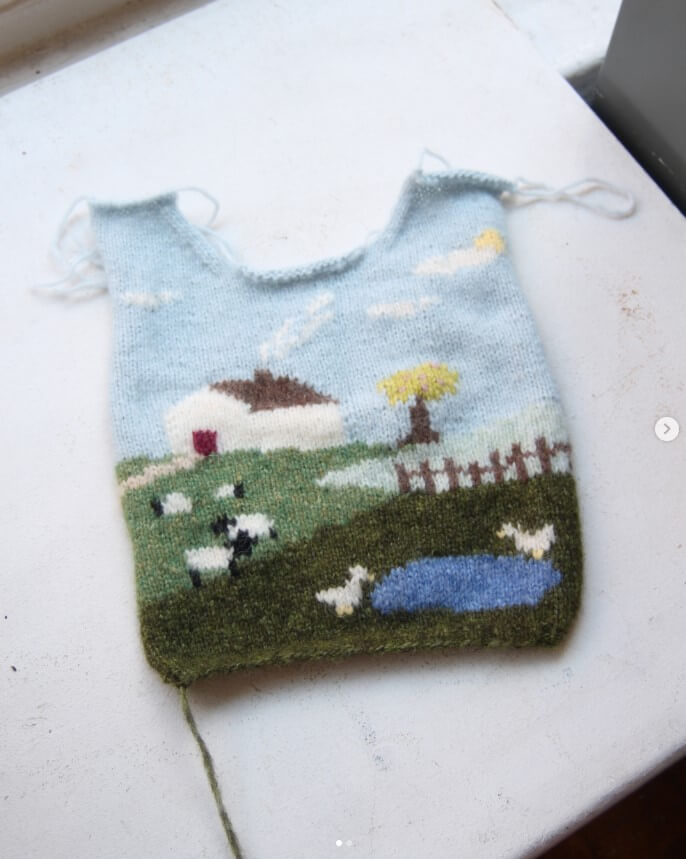
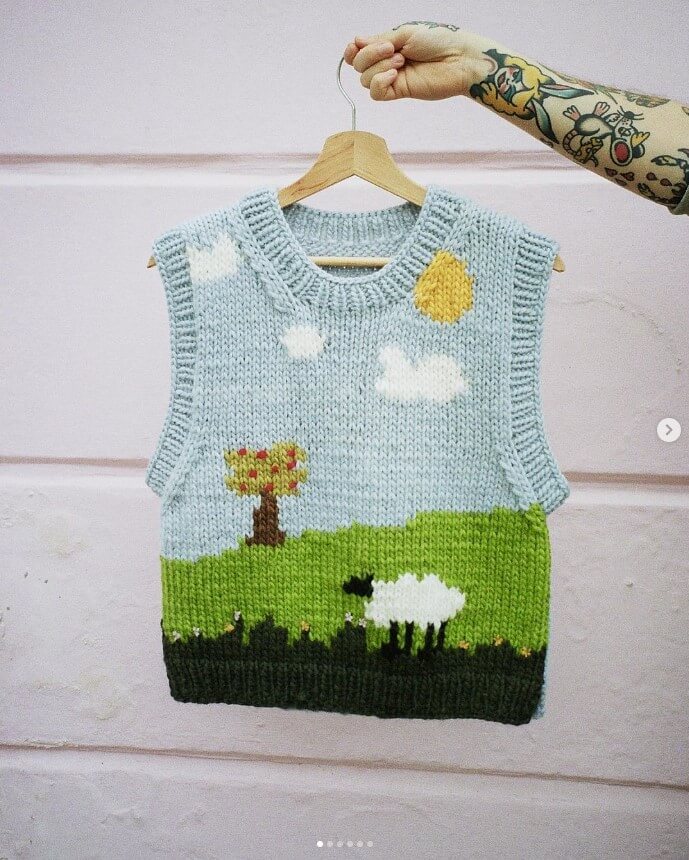
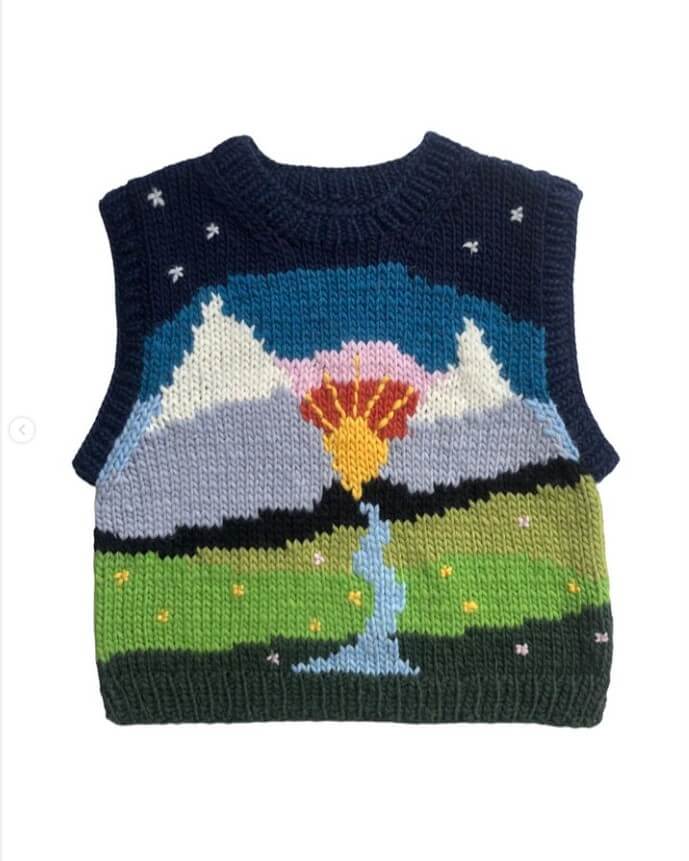
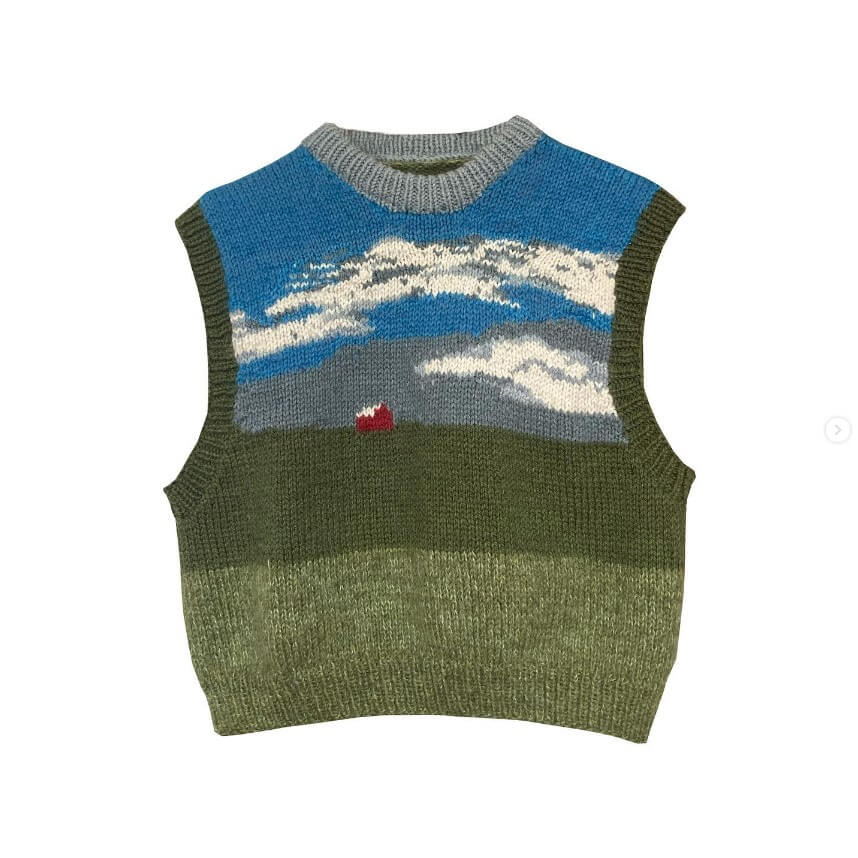
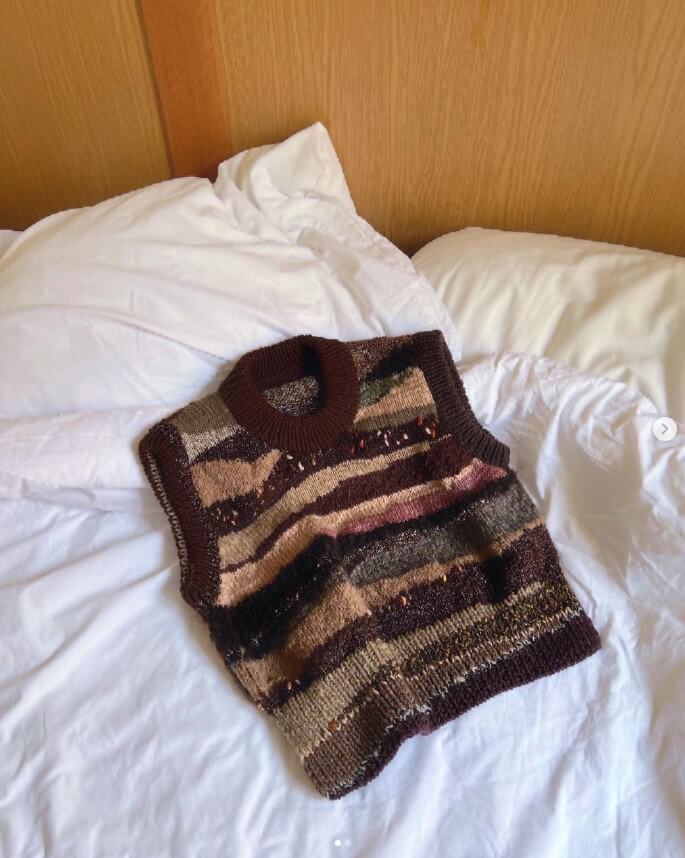
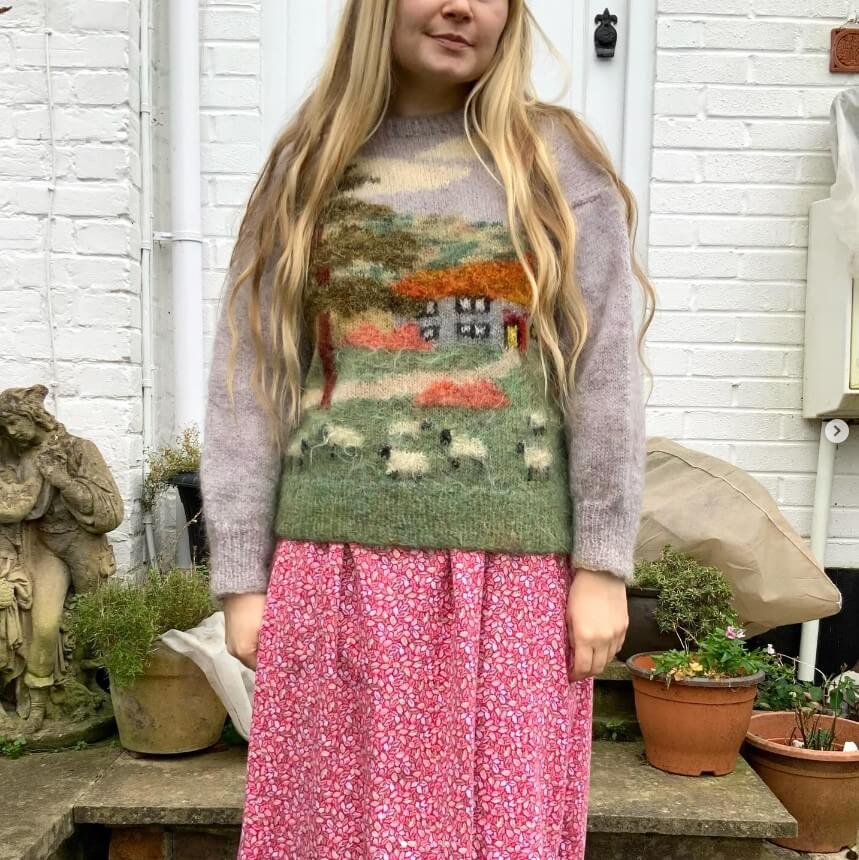
Here are some of the landscape sweater vests I’ve made in the past, and a WIP photo of a little landscape baby jumper I’m knitting for my new niece! It wasn’t until putting all these photos together that I realised how blue heavy they all were! They’re all fairly similar in terms of content too. Next one: suburbia, and after that someone suggested doing a space themed one which I loved the sound of!


Inspiration
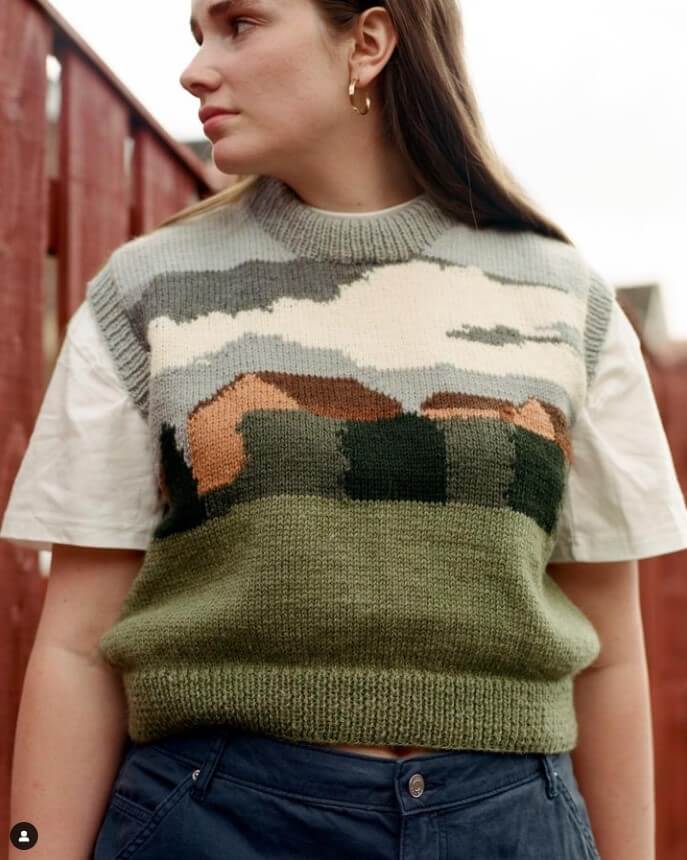
The Amateur Weather Observers
I remember coming across TAWO’s Instagram account a few years ago and being OBSESSED with everything Laura makes. “British people love to talk about the weather; TAWO’s collections seek inspiration from the UK’s erratic climate and diverse landscapes.”.
What I love about Laura’s landscape sweater vests, is that there’s not a huge amount of detail in them. She uses blocks of colour and shapes to convey a scene that is instantly recognisable.
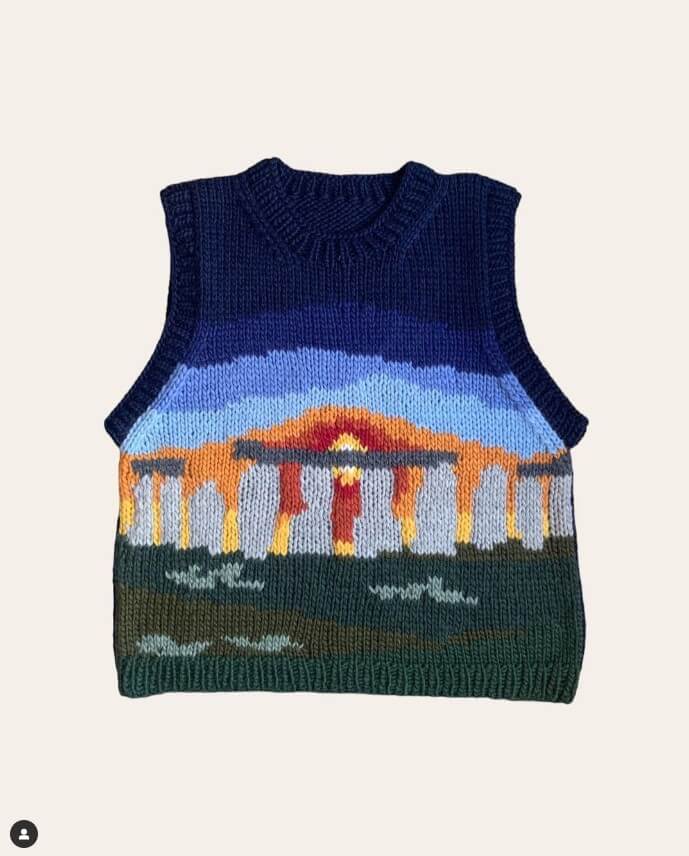
Nomadknit
Eva of Nomadknit creates these stunning and unique vests made from scrap and leftover yarn. She calls them landscape knits which I really love because I think it is left up to the viewer’s imagination what kind of landscape it is.
For instance the vest on the right below, I see a mountain range at sunset. I’m sure other people would see otherwise however!
Eleanor Rose Knitwear
Though she doesn’t make them herself, I love everything on Eleanor’s Instagram. “I find and restore knits that you’ll want to keep forever”.
I love the retro aesthetic of these.
I hope you found this blog post helpful? I’d love to know if you too are drawn to this kind of vintage inspired landscape knitwear or if you’ve tried your hand at a landscape sweater vest yourself?!
Until next time.. Happy knitting!


 No products in the basket.
Perfect timing! I recently saw a t-shirt with a cat on it and am obsessed with knitting it as a vest. You have inspired me, thank you!
Hello Elise,
That sounds amazing! And I’m so glad you were inspired by the post. Good luck with the cat vest 🙂