If you’re new to knitting you might’ve come across the phrase magic loop method and wondered what it meant.
In this post we’ll break down what it is, when and why to use it, and how to do it!
What is the magic loop method?
The magic loop method is a technique used for knitting small circumferences in the round.
When knitting in the round, you’ll need to use a circular needle. There are two variants that affect circular needles: the size (thickness) of the needle and the length of the wire.
The magic loop method doesn’t use the whole length of the wire, rather the knitting only sits on a small portion of it.
When & why should I use it?
As mentioned above, the magic loop is used when knitting small circumferences in the round such as socks, sleeves of a jumper, baby garments and the crown of a hat. Double pointed needles can also be used in place of the magic loop method. There is no advantage of using one over the other, it tends to just be a personal preference for every knitter, and once you’ve tried them both you’ll probably find that you too have a preference.
The reason to use the magic loop method is because in order to use circular needles, you must have enough stitches to fit comfortably around the whole length of the wire without them being stretched.
In the case of knitting things with a very small circumference such as socks, sleeves etc., this isn’t always possible as there isn’t always a needle with a short enough length of wire for the stitches to fit round.
Tutorial
For the magic loop method you will need a circular needle with a wire length of at least 80 centimetres.
Step 1.
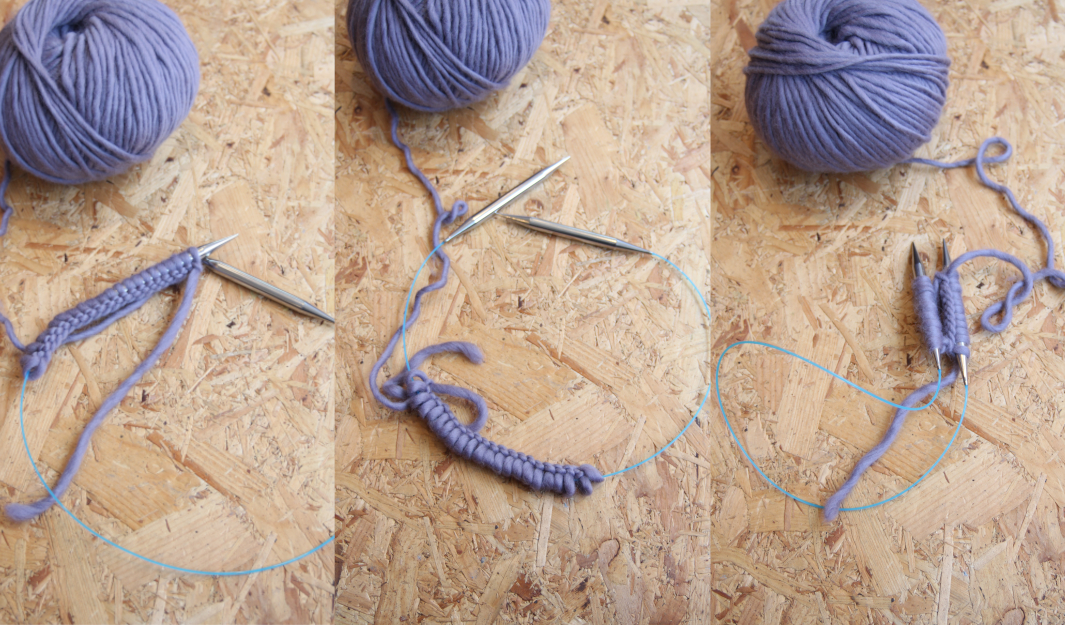
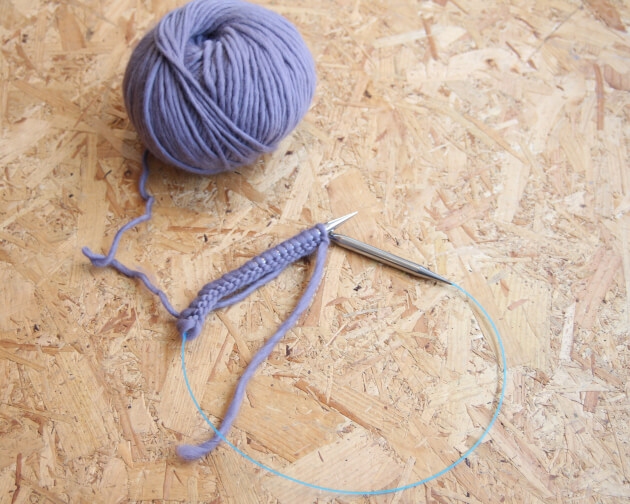
Cast on your stitches as normal.
Step 2.
Move all of your stitches to the centre of your cable.
Step 3.
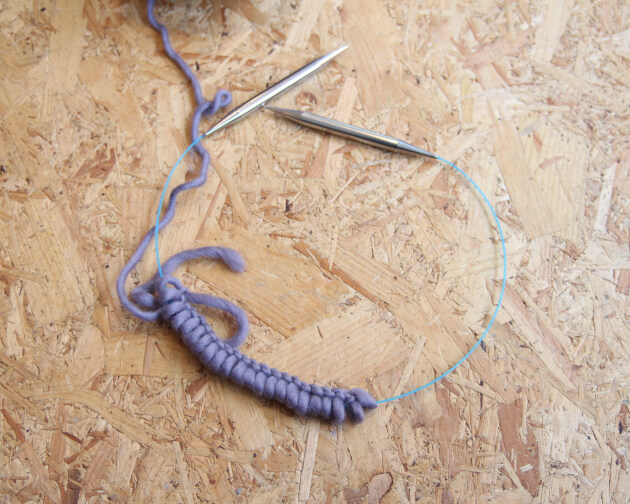
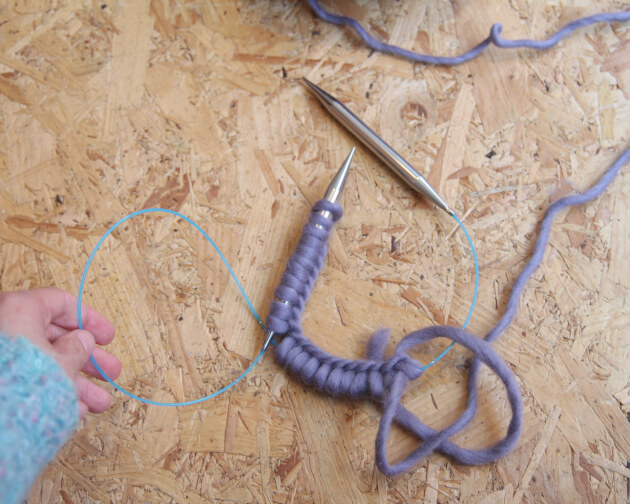
Find the middle point of your stitches, and pull the cable out between them, moving your stitches on to your needles.
Step 4.
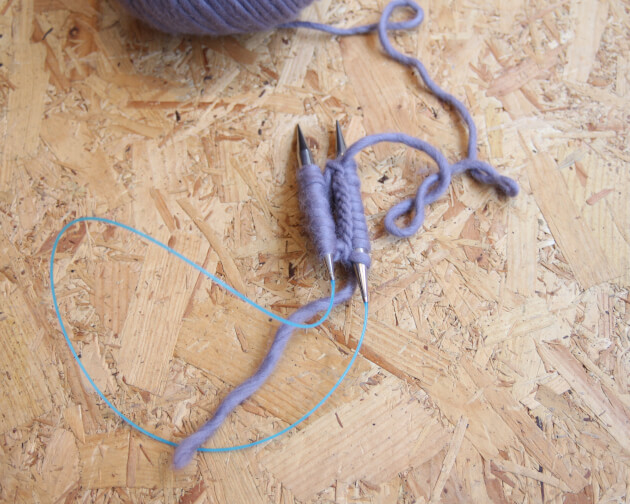
Ensure that your stitches aren’t twisted and that your working yarn is coming from the back (right) needle.
Step 5.
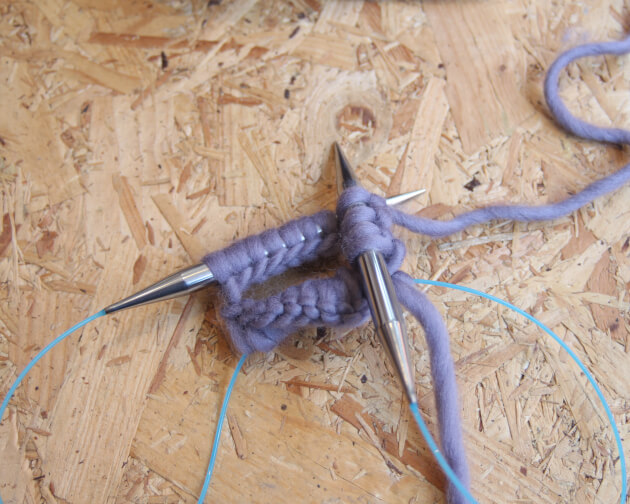
Move the half of the stitches that are currently on the back (right) needle back on to the wire. With your yarn positioned correctly above the wire – begin knitting the stitches on your left needle.
Step 6.
Once you’ve knit all the stitches on your left needle, pull the half of the stitches that are sat on the wire on to your left needle, and put the half of the stitches that you just knit on to the wire.
Your work should now look like how it did at step 5 (other than the fact it’s now joined).
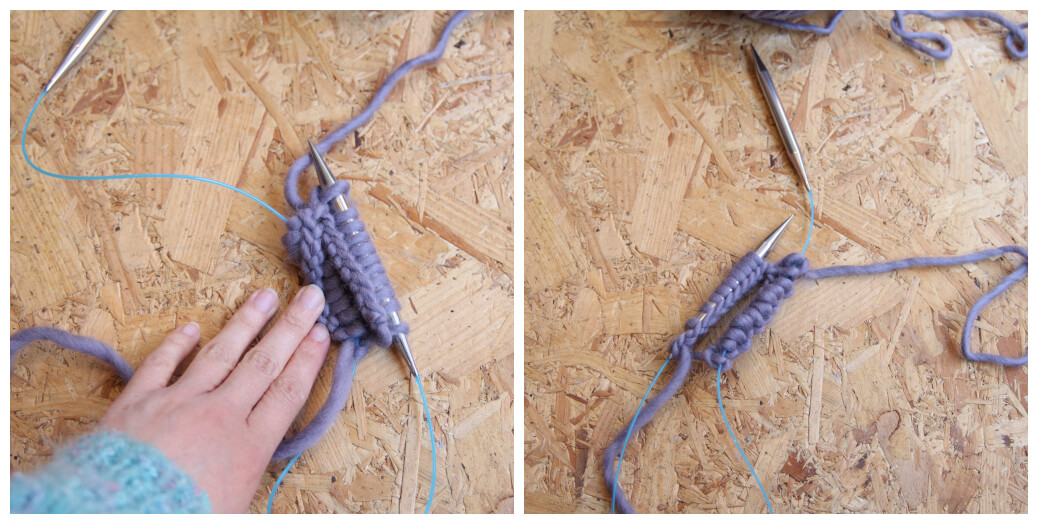
Continue by knitting half of the stitches at a time, whilst the second half of the stitches are sat on the wire.
We hope you found this blog post helpful! Keep an eye out for our ‘How To: Double Pointed Needles’ blog post if you think you’d rather this method of circular knitting.
Until next time.. happy knitting!


 No products in the basket.
I like to use both and have no preference, however it keeps me from losing a dpn when I bring my knitting on trips!
I’m the same. But yes, using the magic loop method definitely makes projects a little more transportable!
Megan