Darning; it’s a chore a lot of us put off. I know I personally have a small pile of knits that need to be darned that I just never seem to have the time for. However, it’s one of those things that once you start, is actually quite enjoyable. And the best part is – anyone can darn, not just knitters! There are a few techniques in here that do involve some knitting knowledge, but the most basic method does not, and can be easily mastered by anyone with a little practice.
In a world of consumerism and fast-fashion, mending and darning is a small act of rebellion. It encourages quality over quantity, prolongs the life of a garment and helps us to value and respect our wardrobe.
In this blog we’ll discuss three different types of darning methods, with varying levels of difficulty.
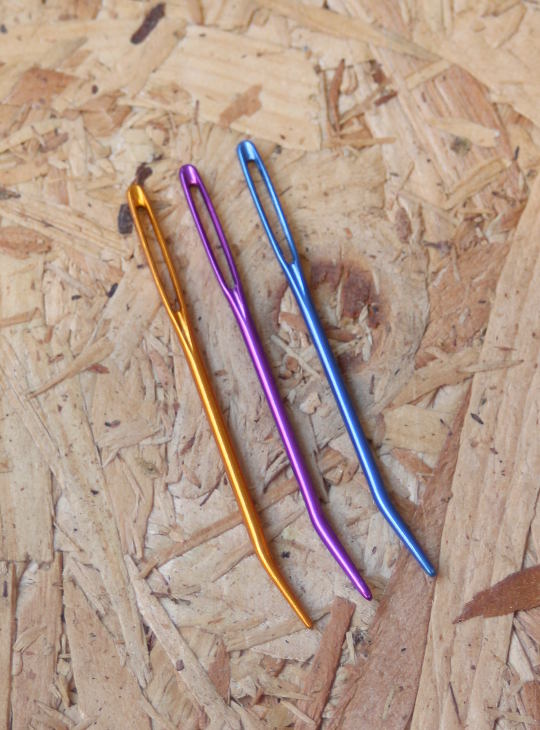
Tools
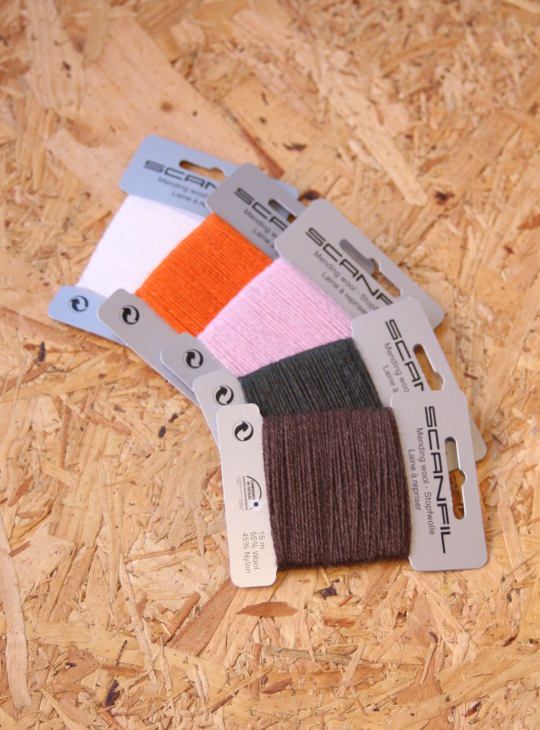
With different darning techniques you may find you need different tools. The most commonly used tools you will need are darning needles, a darning mushroom and darning wool*.
*When finding yarn to darn a hole, you want something the same thickness or a little thinner as the yarn used for the garment. If you use something thicker than that of the garment, it will add bulk which you may find puckers.
For this reason, darning wool (which tends to be very thin) may not be suitable for darning a hole in a jumper made with super chunky yarn for instance. Instead you would want to use thicker yarn that matches the jumper.
If you are mending something you knit yourself, the best option is to use the same yarn if you have any leftover.

The Weave Darn
The weave darn is a simple technique that’s great for anyone who is new to darning, and for using on holes smaller than the size of a 50p. It doesn’t have any stretch, so for anything larger than a 50p sized hole we recommend one of the other techniques mentioned in this blog.
To start, bring your needle and thread from the inside of the fabric out to the right side. This will mean you can weave in the tail on the wrong side later on. With this darn, it is useful to use a darning mushroom to stretch the fabric over. Having the fabric taught over a surface will ensure that your darned patch does not pull the fabric in too much creating a pucker.
As the name suggests, you are essentially weaving. You will begin by creating the ‘warp’. Start a little further back from the hole / thinned fabric so that you are working into the uncompromised fabric. You will be travelling perpendicular, in the same direction as the knitted Vs, and from the top to the bottom of the area you are mending.

Once you have ‘warped’ the width of the entire hole you will now be creating the ‘weft’. You will be working a simple weave stitch. Under one, over one etc. horizontally along the vertical strands and going into the fabric either side to secure the patch to the fabric. You will want to give the yarn a little tug at the end of each row to make it flush, but be careful to not pull it too hard.

To finish, weave in both tails of yarn on the wrong side of the fabric.
The Knitted Patch
This technique can be a little more tricky than the last, due to the fiddly nature of it. It can also add a bit of bulk to the fabric, but it is a strong darn and also has stretch to it, so works well for larger holes. For this technique you will need 2 DPNs and matching yarn.
If you have the same yarn the garment is made with, this will make the most invisible end result. Otherwise you want to match it as closely in thickness as possible. It also helps if you know what size needles the garment was knit with, but if not – just make an educated guess and it’ll soon be obvious if you’re using the wrong needle size.
If there are any live stitches around the hole, you can secure these by putting them on a stitch holder / safety pin to prevent them unravelling and creating ladders.
Like with the weave darn, you will be working in the direction of the Vs. You will want to start a few rows below where the hole and any damaged fabric is to ensure the knitted patch is anchored securely.
Pick up stitches by going in to the right leg of each stitch with one of your DPNs. Pick up a few stitches to the left and to the right of the width of the hole. Once you have picked up these stitches, you will work in stockinette, anchoring the sides of the patch to the fabric by picking up a stitch from the garment at the edge of each row, and knitting the last stitch of the row and the picked up stitch together.
When you come level to any live stitches held on safety pins, put these on your needle and knit them together with one stitch from your patch.
Once you have knit enough rows to cover the damage, you will graft the knitted patch to the fabric using kitchener stitch.
Cut your yarn and weave in any loose ends on the wrong side of the fabric.
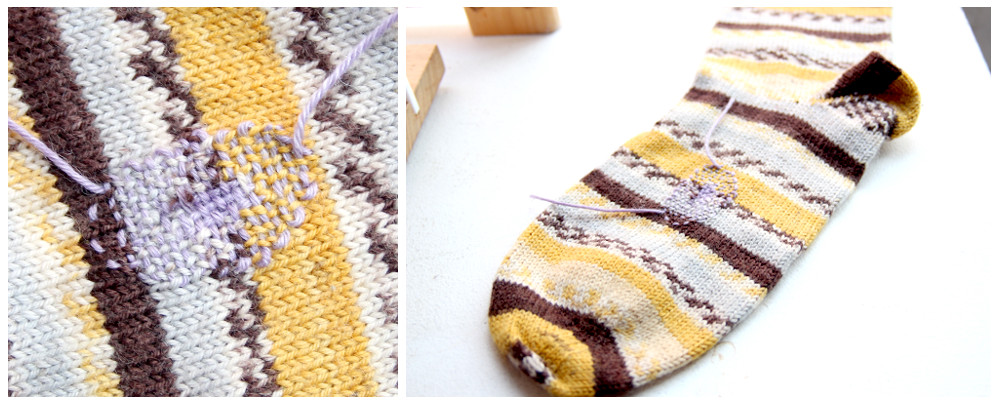
The Swiss Darn
The Swiss darning technique is the most invisible method we’ve included in this list, and it’s another fiddly one! But worth it for a seamless repair. It’s essentially duplicate stitch but with no base fabric to work on.
For this method you will need a darning needle, some scrap yarn (in the same thickness of the garment or thinner), and yarn to match whatever you are mending.
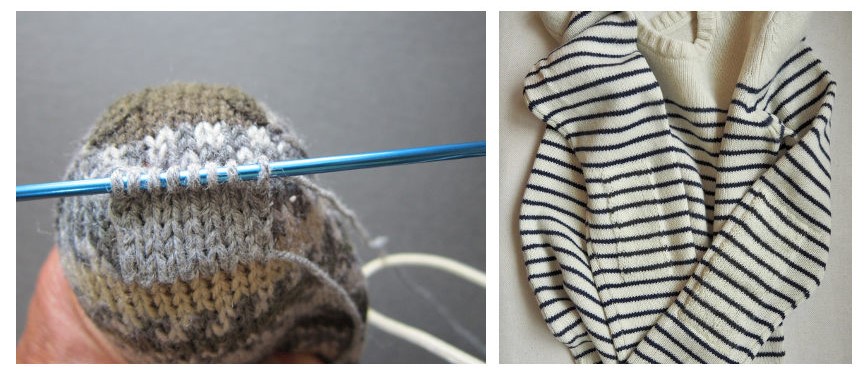
You will begin by creating vertical foundation strands for the duplicate stitch to sit on top of. To do this: thread your needle through the middle of the stitches in the row below the hole to be mended, and follow the vertical column of stitches upwards, to the row above the hole. This can be seen in the photos below, skilfully demonstrated by Tom van Deijnen – aka. Tom of Holland.

Once you have created this foundation, you will then use duplicate stitch to fill in the hole. To strengthen the mend as much as possible, we recommend starting your duplicate stitch a row below the hole, duplicating a stitch either side of the hole, and a row above the hole. This will securely anchor the patch. Work from the bottom up, and side to side.
The Swiss Darn can also be used to reinforce and strengthen areas where fabric is thinning, not only to mend holes. To do this you will not need to create the vertical foundation strands as mentioned above, you can simply duplicate stitch over any thinning stitches and patches of fabric.
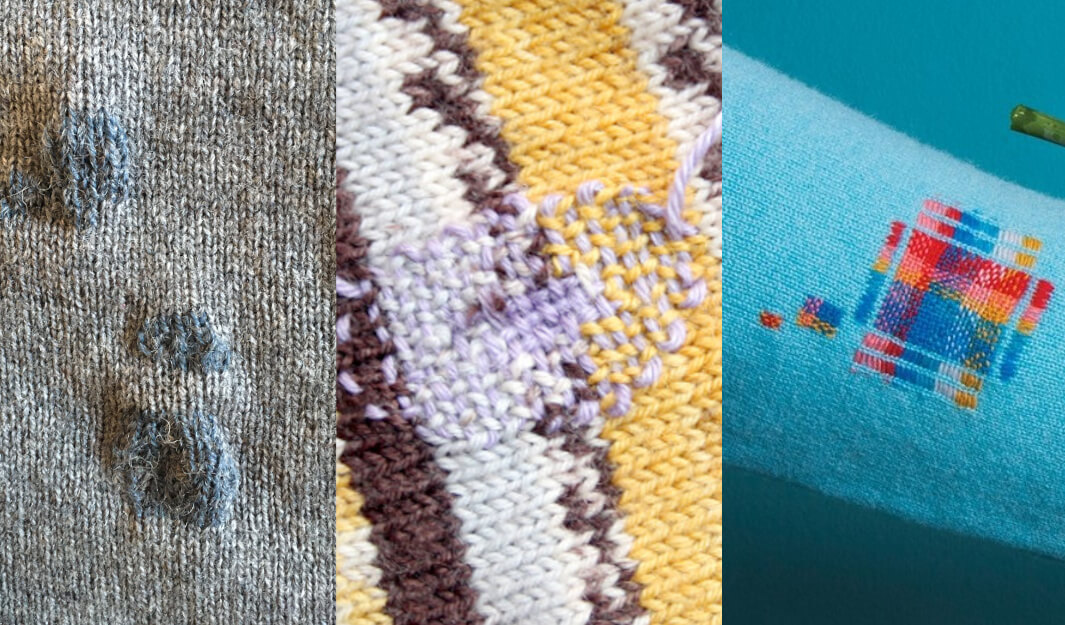
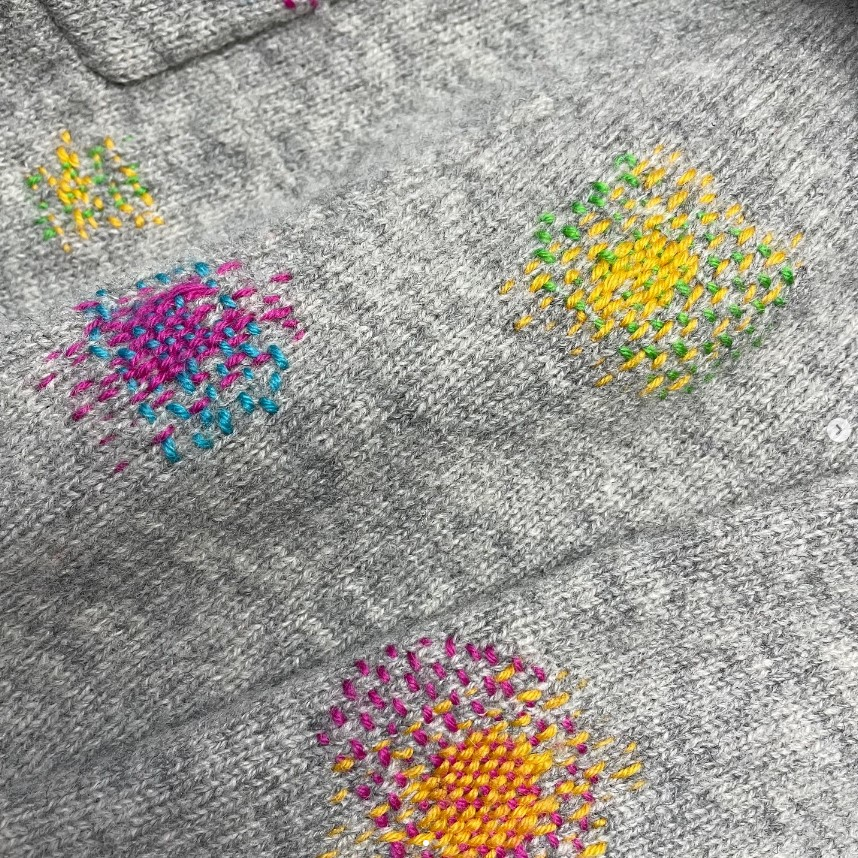
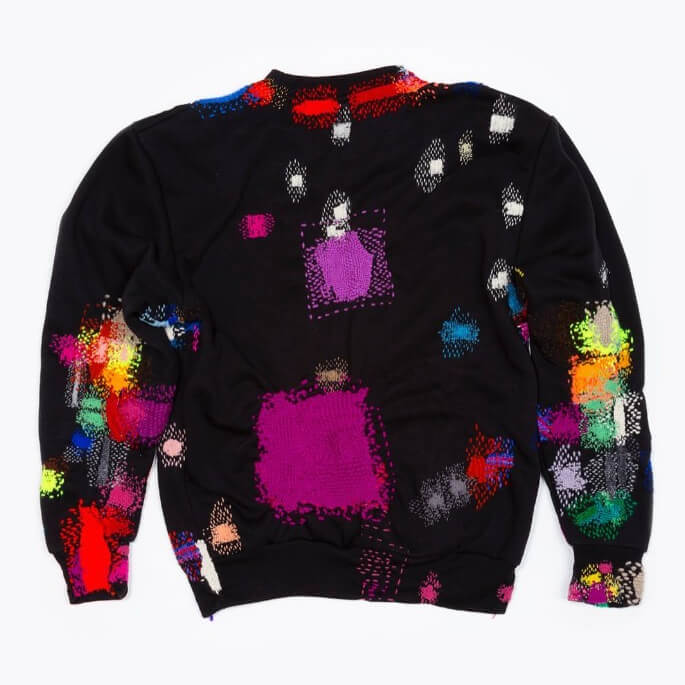
Visible Mending
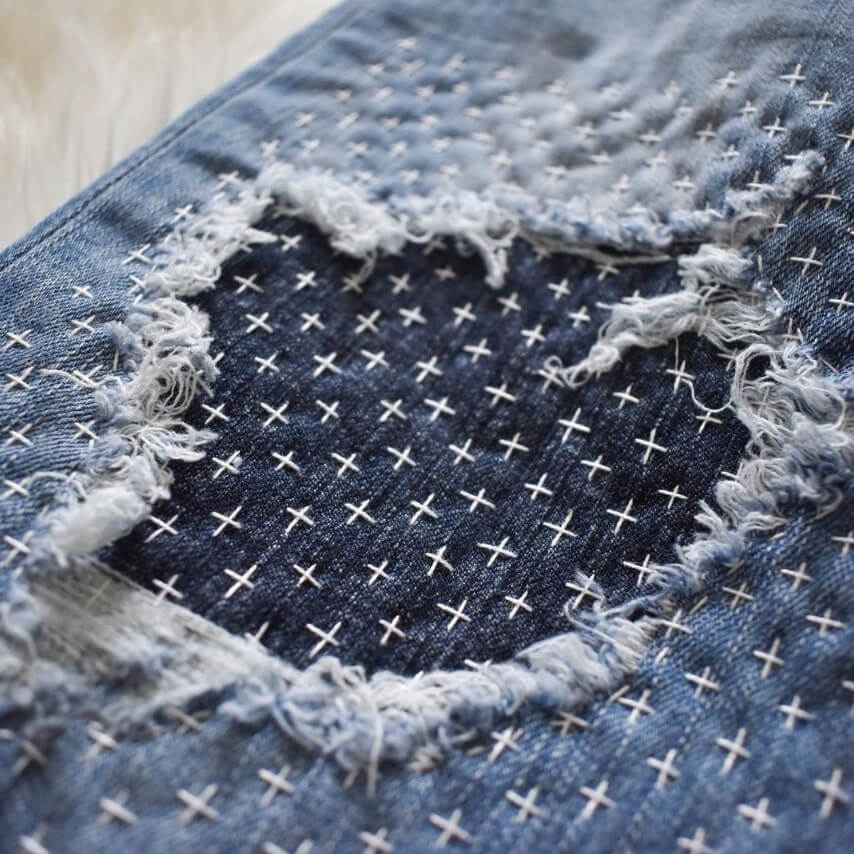
When darning, you may naturally want to make the mend as invisible as possible to not draw any attention to the damage. There is however, a whole practice that celebrates visible mending, born from the Japanese art of Sashiko.
Sashiko mending usually involves white stitching forming geometric shapes to reinforce holes and thinning fabric. Often used on jeans and denim, this creates a striking finished result.
Visible mending can be done in any way, there’s really no restrictions. And it’s taken off on social media in recent years, with the hashtag #VisibleMending having over 194k posts. We recommend looking through this hashtag for some inspiration, the results you can achieve from visible mending are stunning and have the ability to completely transform a garment.
We’ve included a few beautiful photos from visible mender’s Instagrams here, to show you what can be achieved with this artform.

We hope that we’ve encouraged and inspired anyone out there who, like me, has a pile of clothes that need to be mended! I know I’ll certainly be making a priority of finally sitting down to darn those holes.
If you did find this resource helpful, be sure to check out the rest of our blog where you can find tutorials, pattern inspiration and the team’s recently finished pieces!
Until next time.. happy knitting!


 No products in the basket.