As a beginner knitter, it can feel frustrating when your skill level doesn’t match the skills required for a project you want to make. It can make choosing projects frustrating.
In this blog post we’ll walk you through 5 knitting techniques to master, which will help you get better at knitting faster and achieve your knitting goals. In our Brighton shop we get asked a lot, how long will it take me to be good enough at knitting to be able to knit a jumper? It’s a hard question to answer because everyone is different, everyone has a different amount of time they are able to dedicate to practicing.
However, one common mistake is to start with projects that are too big, a scarf or a blanket for example, which will only teach you a limited number of techniques. Not to say there is anything wrong with knitting these projects, you of course have to really want the item at the end, but when you are first staring they are likely to take months to complete. This is why our advice is to choose smaller projects and with each subsequent project make sure it includes a new technique so your knitting knowledge can grow rapidly.
These 5 small projects include almost all the techniques you need to learn to be able to knit something as complex as a jumper or cardigan. If you aim to make these 5 patterns within a year, we guarantee you’ll be making jumpers by the end of it!
We’ll also explain briefly about how to fix a mistake. Learning to spot when you’ve made a mistake and being able to fix it, is as much of a skill as anything else in this list, and probably one of the most important! It’s not uncommon for beginners to realise they’ve made a mistake, have no idea how to fix it or where the mistake even is, and ultimately give up on that project.
So, if you want help getting better at knitting faster: read on.
The Basics: Casting On, Knit And Purl, Casting Off
The foundation of all knitting is knit and purl stitches. They’re the building blocks for pretty much all other stitch patterns and techniques, and for this reason the first and most important step to learn. And you can’t begin knitting without casting on, and equally can’t finish a project without casting off.
To use only knit stitches results in a fabric called garter stitch (left photo below), which is the little rows of waves.
To achieve the most common looking knit stitch, and most likely what any knit pieces you have in your wardrobe are made of, you need to be able to purl. One row of knit and one row of purl results in a fabric called stockinette or stocking stitch (right photo below). This is the classic looking V shaped stitches.


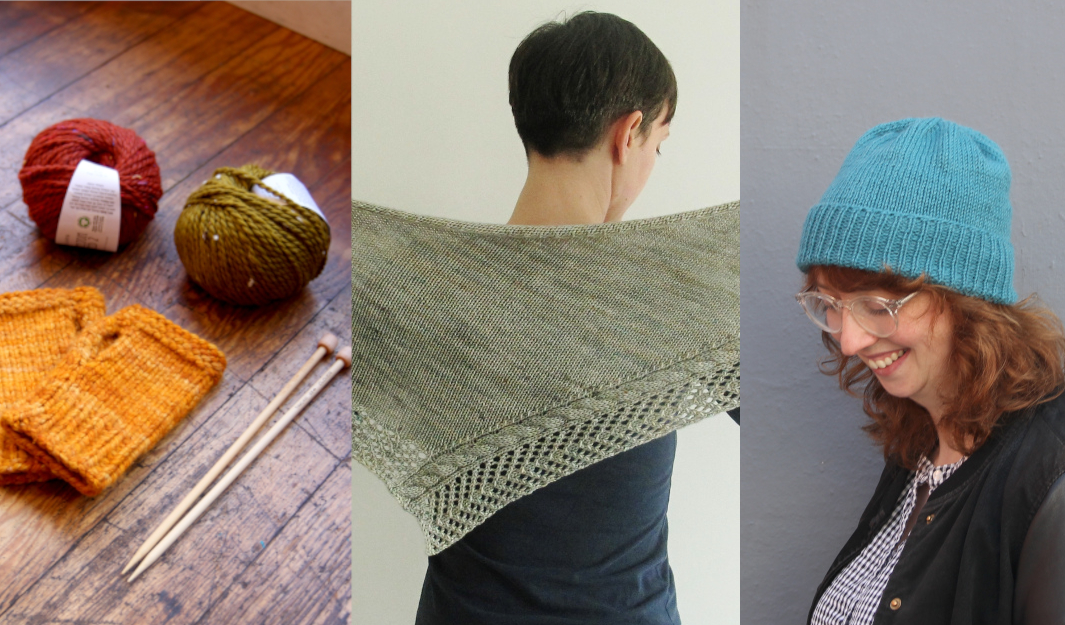
To master these basics we have a Learn To Knit: Beginner Mitts Kit. The beginner mitts pattern is the perfect introduction to knitting. Through making these you will practice casting on, garter stitch and stockinette stitch (as mentioned above), ribbing, casting off and mattress stitch.
These mitts are knit in chunky wool and 5.5mm needles, which will work up quickly once you’ve got the hang of the stitches. Lots of beginner knitters will want to start with a scarf, but actually they’re so long and repetitive it can be easy to lose stamina with a scarf! These mittens are the perfect size to teach you the basics, and not give you burnout in the process.


Knitting In The Round
If you’re in the knitting world, you will most likely have heard of and / or seen circular knitting needles. Learning how to knit in the round is a sure way to get better at knitting faster! This technique can seem daunting to new knitters, but in a lot of ways it actually simplifies things.
Firstly, because other than the ribbing, you only have to do knit stitches to achieve stockinette stitch. This is because you’re knitting in one direction, rather than turning your work at the end of each row. Secondly, it’s a seamless way of knitting, meaning you can make a big project like a jumper without having to sew any parts together, it’s made in one piece! This is overall a neater, and hassle free way of working.
There’s a few ways to knit in the round: with circular needles or double pointed needles. (We have a whole blog post on knitting needles and their uses if you want to read more in depth about them here!). They both achieve the same thing, but are used in slightly different circumstances.
When knitting with a circular needle, you must have enough stitches to fit comfortably around the wire (the wires come in different lengths) without them being too stretched.
For knitting very small circumferences such as socks or sleeves on a baby cardigan, when the amount of stitches you have won’t fit around the whole length of wire, this is where you would use double pointed needles. (There is also a technique called the magic loop method which is used for knitting small circumferences in the round, we’ll explain this in another post!).
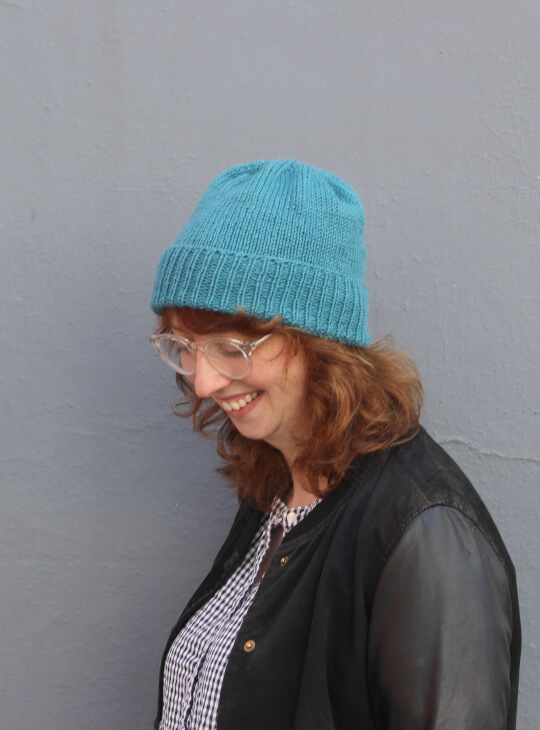
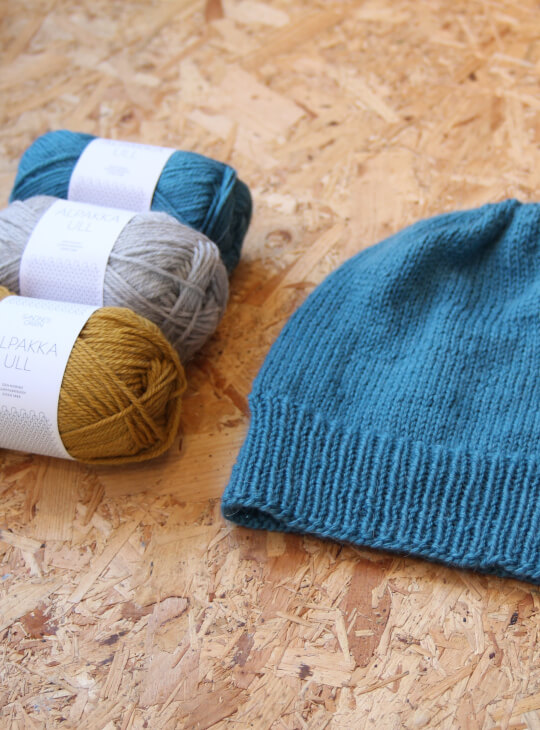
To help you learn how to knit in the round, we have the Classic Hat Kit. This is the perfect project to learn how to knit in the round, as you will use both circular needles and double pointed needles.
Lace And Cables
The next technique we think will help you get better at knitting faster is learning how to knit lace and cables. Visually, these are a real jump up from the first two techniques mentioned above, and they can seem scary to new knitters. However, we promise they look harder to do than they actually are!
Cables are essentially repeats of knitting stitches in the wrong order. Using a special cable needle to put stitches on hold, you then twist them around ones you’ve already knitted, criss crossing them over each other.
Lace stitches use a combination of decreases, increases and yarn overs. That’s it! Used in a repeat pattern these simple techniques will create the beautiful, delicate lace stitch patterns you often find in shawls and scarves.
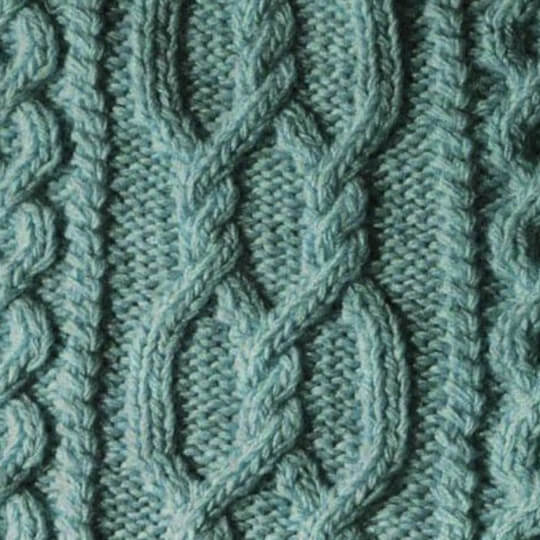
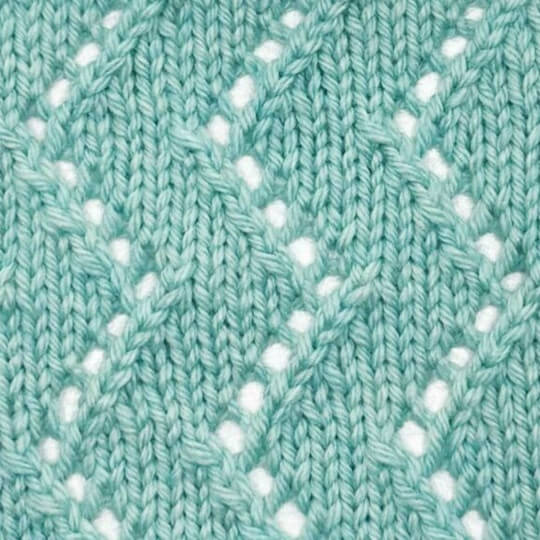
These two techniques used in slightly different orders can create thousands of different looks, and once the basics are mastered the door to what you can knit will open to a whole variety of different patterns.
To master these two techniques we have the Inbtweener Shawl by Dani Sunshine, this is what we teach knitters to make in our Next Steps In Knitting class. The pattern uses a simple cable and lace pattern for an elegant, wearable shawl. For anyone who might still be feeling like this is jumping in to the deep end, this shawl is made in a worsted weight yarn, so it won’t take ages and ages to make!


Picking Up Stitches
The penultimate technique we suggest learning is picking up stitches. This is another technique that will really expand the list of the kinds of projects you can make, and help you get better at knitting faster. It is one of the most important things to learn if you’re planning on making jumpers.
Picking up stitches will either be worked along a cast off edge, or the side of a piece of knitted fabric. A few places you would use this technique is: adding ribbing around the armholes of a vest, adding a neckline / collar, knitting sleeves, among many others.
To pick up stitches, you will need to insert your needle in to the side of a stitch (these look like the letter V) along the edge of your knitted fabric, loop your yarn around your needle and bring it back through, this will make a new stitch.
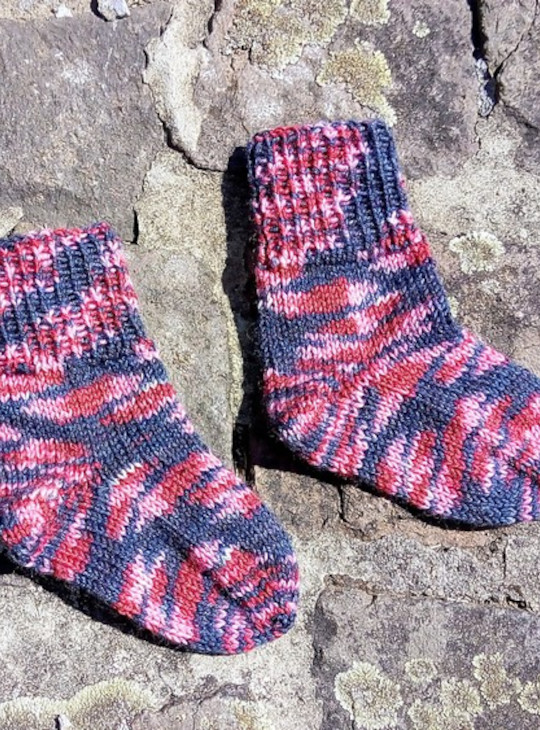
To practice this technique we suggest making a pair of baby socks. The Preemie and Baby Socks pattern by Stefanie Bold is a free Ravelry download. Not only will this be a good project to practice working in the round with a small circumference, either with the magic loop method or double pointed needles, but you’ll need to pick up stitches and also turn a heel.
Socks are commonly made in thin yarn called 4 ply / fingering weight. Because it is so thin, projects made in it can progress slowly, so for this reason we suggest baby socks so you don’t have to dedicate as much time to learning these techniques.

Colour Work
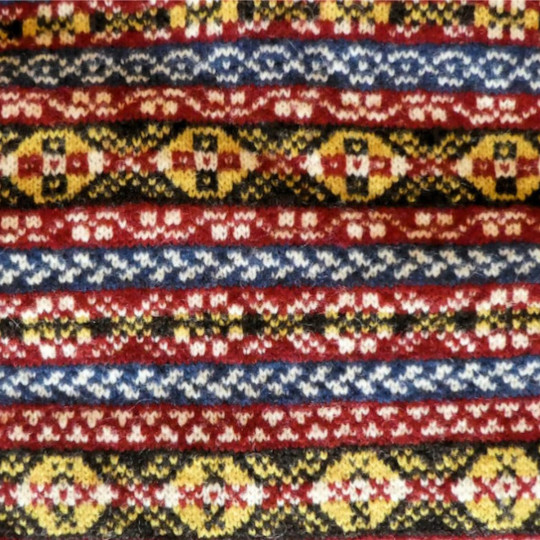
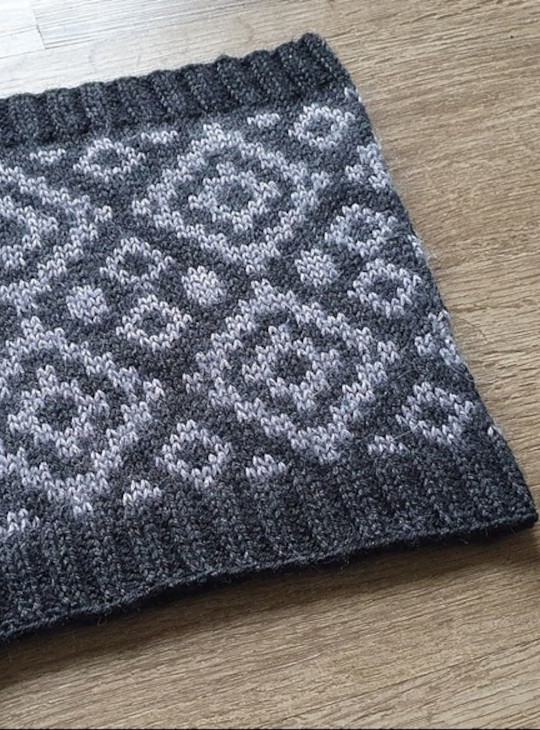
The final technique we recommend to get better at knitting faster, is colour work. There’s a few different ways of adding multiple colours to your knits: fair isle / stranded colourwork, intarsia, duplicate stitch etc. For now, we’ll be focusing on fair isle / stranded colour work.
Fair isle looks a lot more difficult than it actually is to do. For now lets assume you’re knitting with two colours: main colour (MC) and contrasting colour (CC). Fair isle is usually knit in the round, so you can see your pattern forming. First you’d knit a few stitches with your MC, then drop the MC, pick up the CC and knit a few stitches with that. That’s it. You’re only ever knitting one stitch at a time, with one colour.
At the back of your fair isle project you’ll have what are called floats (left photo below). Floats are where you’ve carried the passive yarn over the recently worked stitches. It’s important to keep these loose and not pull the CC colour tight when you pick it up, to avoid your knitting bunching up. Read our blog about trouble shooting stranded knits for more tips.
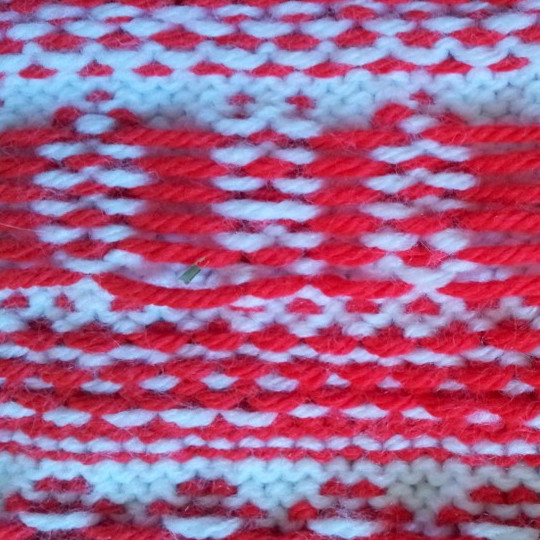
Due to the floats at the back of fair isle, the fabric is less stretchy than plain knitted fabric. It’s important to take this in to consideration when choosing a size if you’re making a garment.
To practice fair isle, we suggest the Home (Again) Cowl by Leslie Roth (this is another free Ravelry download). The length is adjustable and it only has two colours, so we think this is a great pattern to introduce you to the technique.

Mistakes: How To Spot Them & How To Fix Them
Dropped Stitches
As mentioned in the introduction, we’ll briefly explain some common ways beginners make mistakes, and how to fix them.
I think probably the most common mistake is dropping stitches. One way to prevent this is to count your stitches every or every other row to make sure you still have the same amount you casted on (I do this as I’m knitting them, but you can also count them once you’ve finished the row). This way, if you do have less than you should, you know it was only dropped in that row and therefore know where to look for it.
Dropped stitches are fairly obvious, as a ladder will appear between the two stitches either side of the dropped stitch. One way to fix this is by using a latch hook or a very thin crochet hook, to ‘re-knit’ the stitch. Depending on how many rows back the stitch that was dropped is, there will be what look like bars above it. Insert your crochet hook into the dropped stitch, and hook that bar through the stitch. Keep doing this with the next bar up until you’ve reached the row that you are currently and can put the stitch back on your needle.
Increased Stitch
Another common mistake made by beginners, is increasing stitches unintentionally. This can be done in a few ways. Either by not sliding the stitch you’ve just knit properly off the left needle, or accidentally picking up the bar between stitches and knitting that.
Again, a way to prevent this is by regularly counting your stitches to make sure you have the right amount. Increased stitches can be harder to spot, so if you’ve knit inches of fabric and don’t know where the mistake was made, it might be harder to find.
If you look at a piece of knitted fabric, whether that’s garter stitch or stockinette (or another kind of stitch), you will be able to follow a column of stitches from the bottom up to the top. Let’s say you’re knitting something with ten stitches but have ended up with eleven. if you follow each stitch’s column down to the bottom, you should be able to track it back to where you cast on. If your stitch doesn’t go all the way down to the cast on edge and instead looks like it starts from somewhere half way up the fabric, that is your increased stitch. Unfortunately there’s no way to fix this (neatly) other than undoing the work past the mistake.
Lifeline
One last tip we’ll share is using a lifeline. If you’re about to start something you think you might have difficulty with and need to unravel, if it’s a new technique for example, and want to save yourself hours of slowly unpicking rows, use a lifeline. Thread a length of scrap yarn through the stitches currently on your needle purl-wise, and then continue knitting. If you do end up needing to undo a few rows, you can do it safely, knowing that when you reach the lifeline your stitches won’t unravel any further as they are being held by the scrap yarn.
Usually you won’t even end up needing it! I think just psychologically, knowing it’s there gives you the confidence boost you needed. Better safe than sorry though!
So, Time To Get Better At Knitting Faster!
We hope this blog helped you and perhaps eased any doubts you had about learning new skills. Knitting really is such a wonderful hobby, whether you’re a process knitter and enjoy the act of knitting itself, or a product knitter and prefer wearing your knits than making them (read our ‘Are You A Process Knitter Or A Product Knitter?’ blog post here), to be able to make something wearable from scratch is such an affirming skill to have. I know that I always feel a real sense of achievement after casting off a project.
We love talking about all things knitting and crochet here at YAK, so if you want to read more head to our blog to check out the rest!


 No products in the basket.
I am not an experienced knitter, and suffer arthritis in my hands so can only knit a little at a time, – but your blog is really interesting, have picked up a few tips, thank you
Hello Frances,
I’m glad you’ve managed to find some tips from the blog – that’s why we write it!